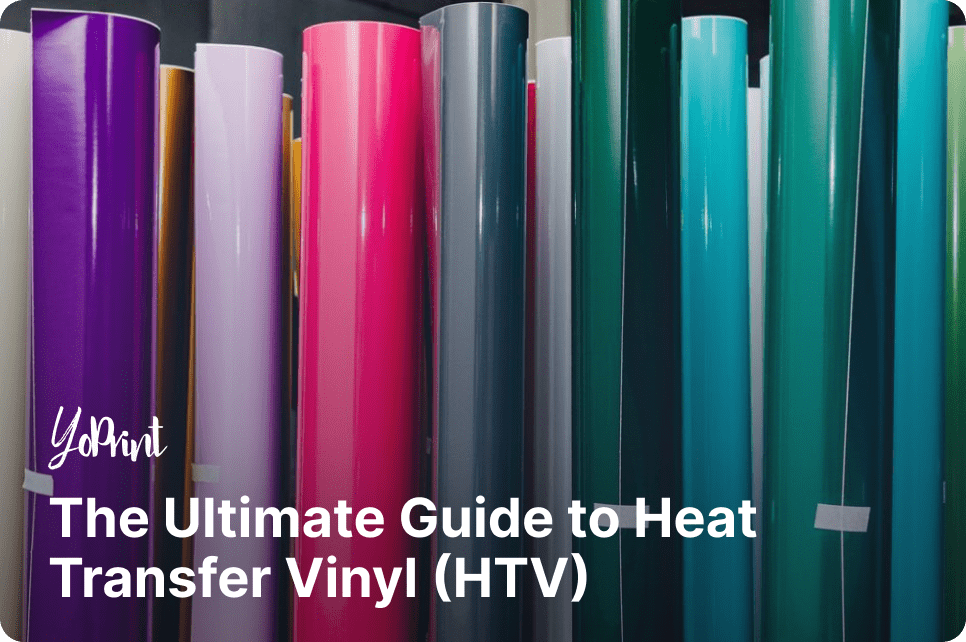
Heat transfer decorative printing methods have been all the rage in recent times. Direct-to-film (DTF) printing, in particular, has gained significant traction for its relatively low startup costs, easy-to-learn process, and vibrant and durable results. But before DTF came to the forefront, heat transfer vinyl (HTV) was a popular heat transfer decorative method. In fact, many custom printers had their start with HTV.
So What is HTV Anyway?
HTV uses polyurethane-based vinyl sheets to decorate garments, apparel, and other items. One side of the vinyl material is called the carrier, which holds the vinyl in place when you’re applying it to a substrate. The other side is a heat-activated adhesive backing that enables the material to adhere to the substrate’s surface. You can tell these apart easily: the carrier has a shiny appearance, while the adhesive side has a more muted color.
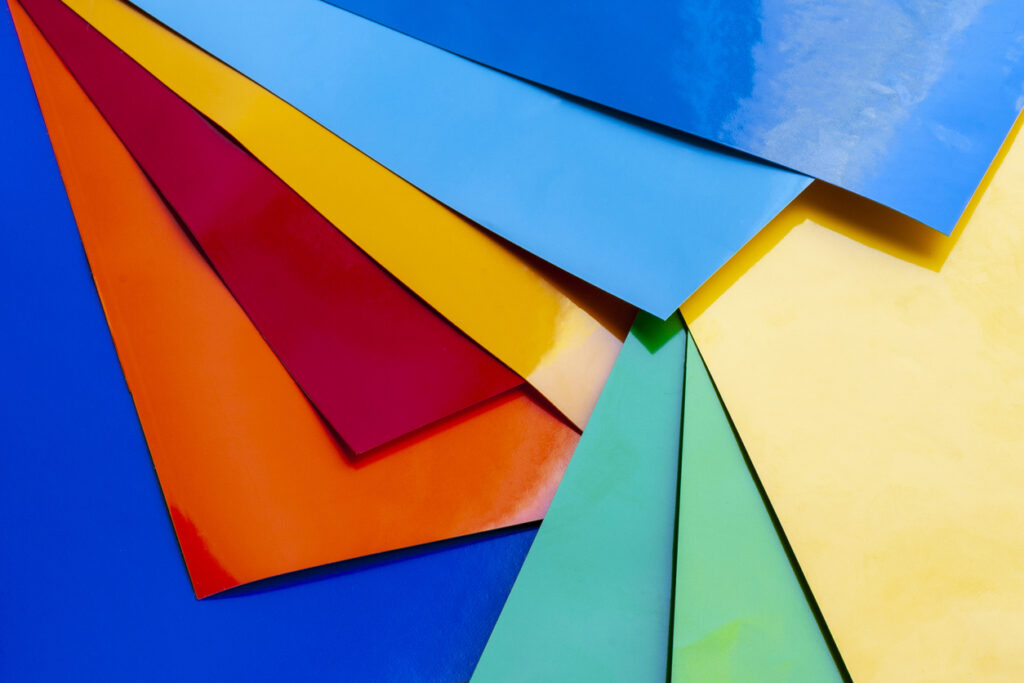
Vinyl sheets come in various forms: you’ll find them in different colors, shapes, and even thicknesses, all of which can be used to create unique-looking designs. The biggest strength is that vinyl sheets are relatively inexpensive, though specialty vinyl can be a bit more expensive; in fact, a major reason why many people like HTV is because it’s an affordable way to start with decorative apparel printing.
Working with HTV
The first step is to create a cut file with the desired design. You could either create your own with design software or use one you find online (some websites offer cut files you can print and use). You can edit the cut file to suit your printing needs. It’s important to ensure the design is mirrored, as you’ll be cutting on the adhesive backing.
Before you finish up, make sure you double-check all your settings first. This is also important for setting up the vinyl cutter. No two vinyl sheets are the same, so be sure to do a test cut to ensure you’re cutting it properly. Too little force and you won’t be able to weed the design properly; too much force and it’ll cut clean through the carrier.
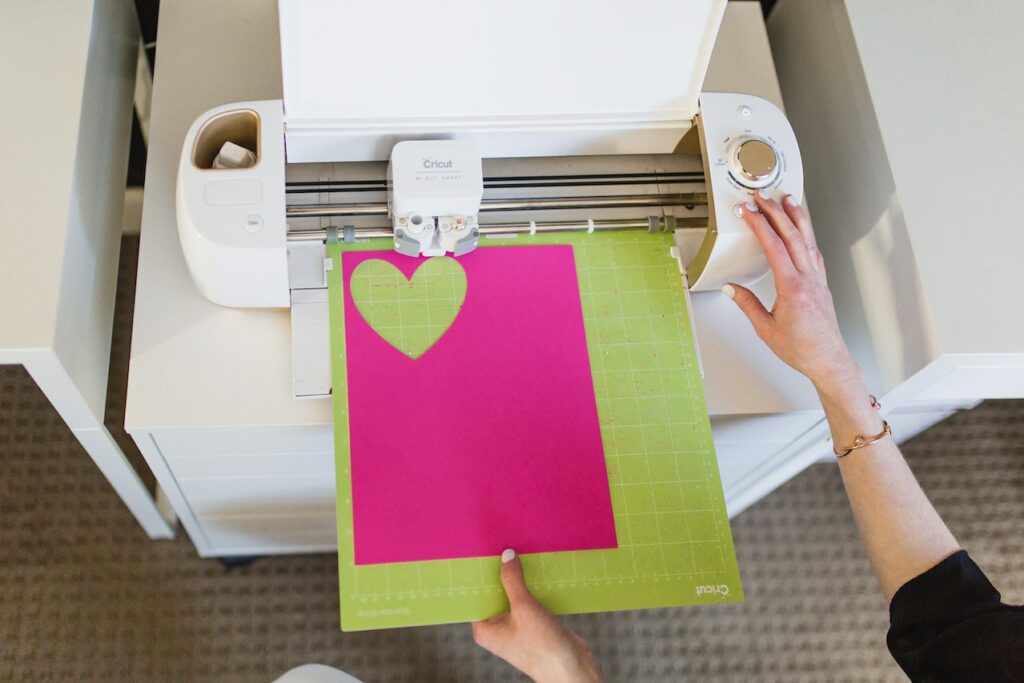
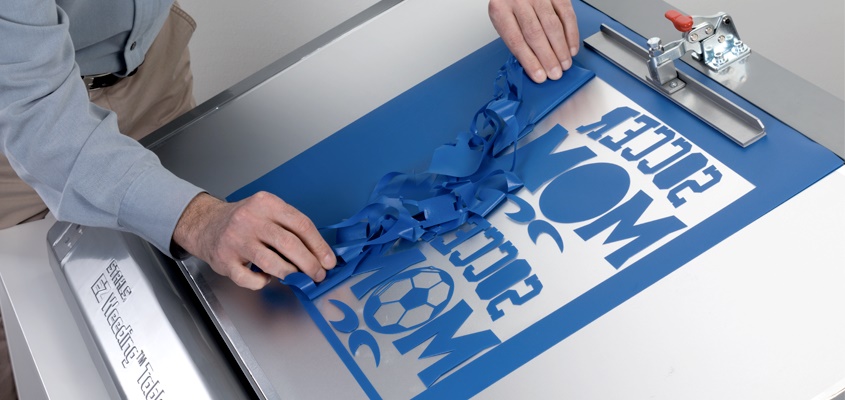
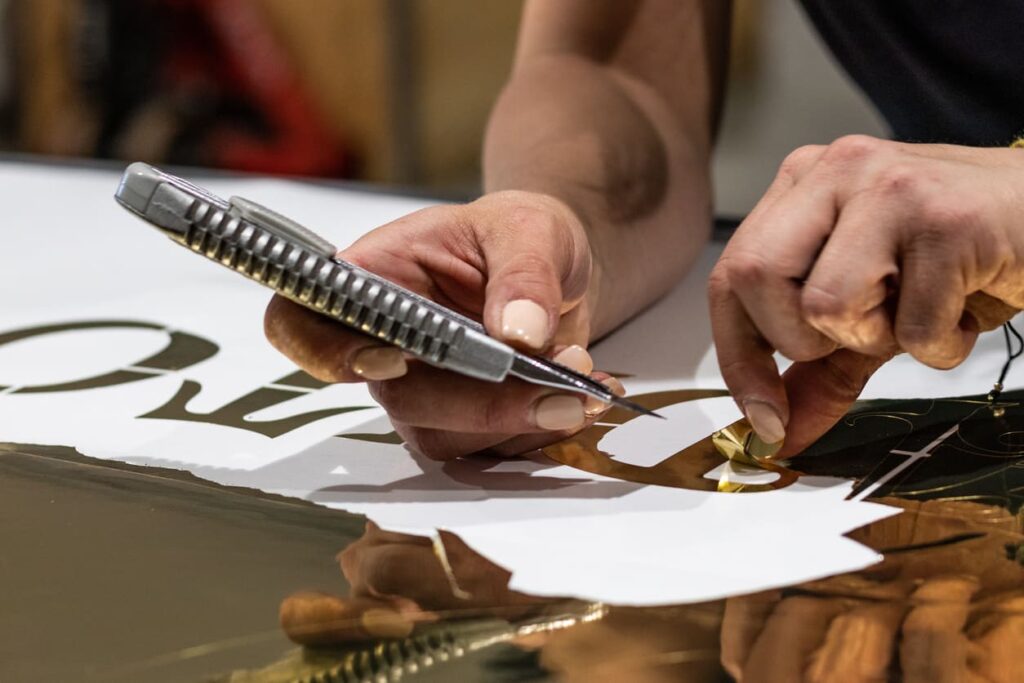
Once everything is set, load the vinyl sheet into the vinyl cutter: ensure that you load the vinyl cutter with the vinyl sheet’s carrier side face down. If everything looks good, start the vinyl cutter and let it do its job. Once completed, remove the vinyl sheet from the cutter and use your weeding tool to start weeding excess vinyl from the design. The weeding tool offers an easier and more accurate way to weed excess vinyl, so keep a few handy in your shop.
After you’ve finished weeding, take it to the heat press. Place it on top of your chosen substrate and position it carefully to where you need it to stick. Cover it with a Teflon sheet to protect it from excess heat (which can permanently damage your vinyl), then set the heat press to the recommended settings and apply it to the vinyl transfer. Once ready, carefully remove the plastic carrier from the substrate (depending on whether it’s a hot, warm, or cold peel). Your HTV print is now complete!
What You’ll Need for HTV Printing
You won’t need much equipment compared to other decorative apparel methods. That won’t stop you from creating your own eye-catching designs with HTV.
Vinyl Cutter/Plotter
The most important component for any HTV project is the vinyl cutter. As the name implies, the vinyl cutter will cut out your design based on its cut file. Inside its tool cartridge is a knife, enabling the machine to cut out the design per your cut file. The cutter has many configurable settings that enable it to cut different materials easily; you’re not limited to HTV only and that’s a plus point.
You may also hear about vinyl plotters as well. Compared to a vinyl cutter, a vinyl plotter is equipped with a pen that allows it to draw your design or artwork on the substrate. Most vinyl plotters are sold as a vinyl cutter-plotter combo, which has both a cutting knife and a pen, while others may exist solely as plotters. If you want to purchase a vinyl plotter, ask the seller if it can print and cut.
There can be some confusion if you first hear about vinyl cutters and plotters. Simply put, they’re both the same exact machine: in some cases, some vinyl cutters are able to print and cut. In contrast, some vinyl plotters are only able to print designs. Hence, it’s important to determine what your potential purchase can do for your HTV printing.
There’s also the size of the machine. Entry-level vinyl cutters/plotters are generally sufficient for newcomers to create small designs for various substrate applications. Larger commercial cutters/plotters would be suitable for larger-scale applications, such as banners, signs, or even multicolored jobs.
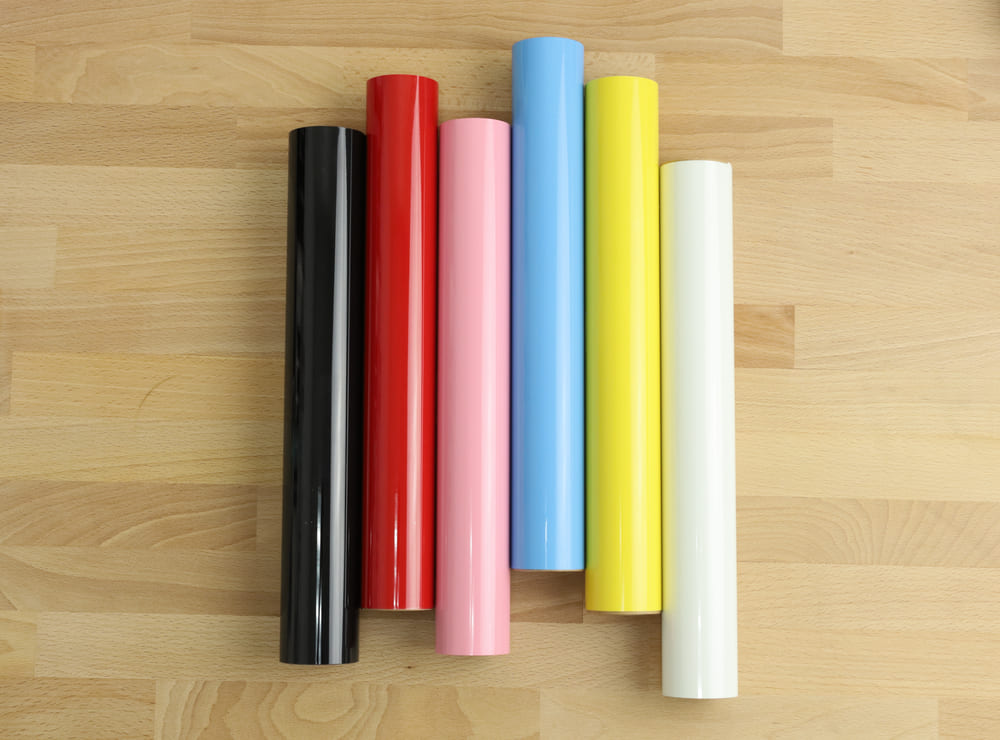
HTV Sheets
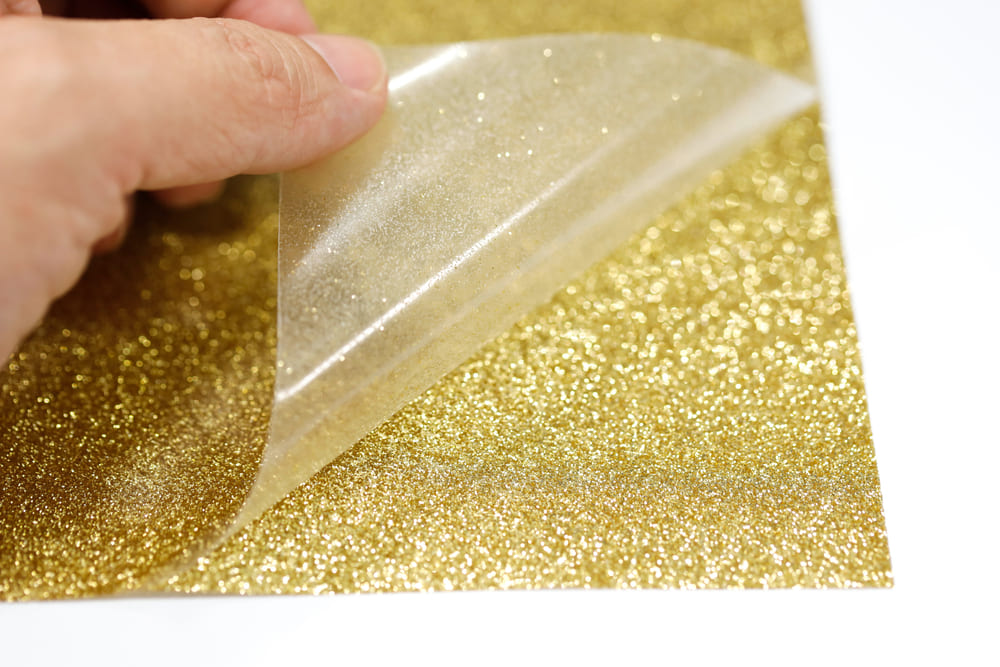
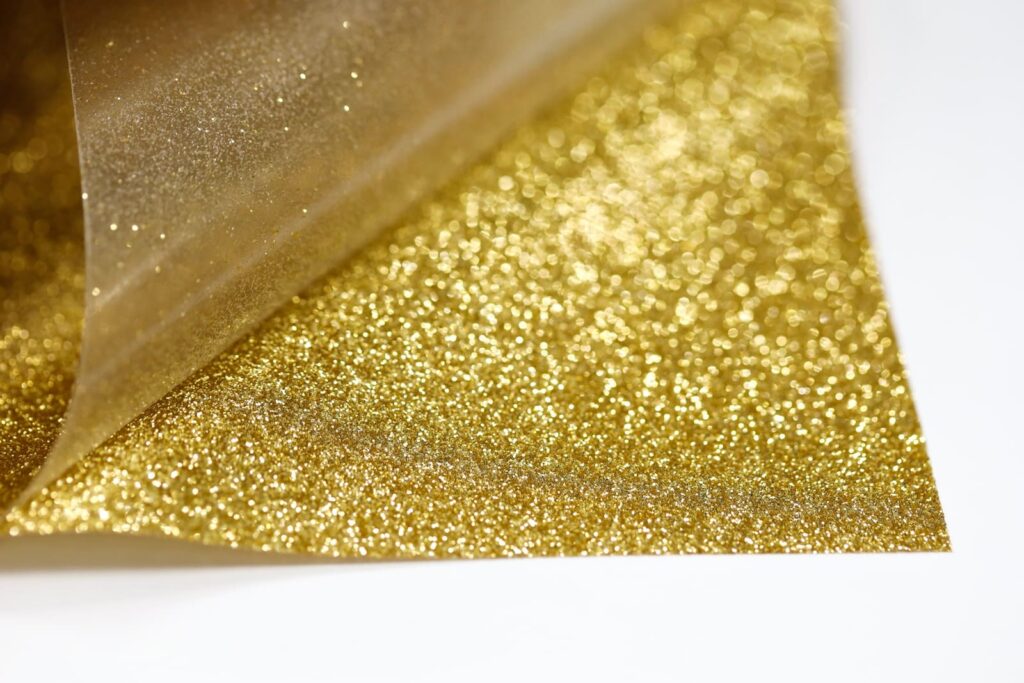
This is what your vinyl cutters will cut to create your designs. Vinyl comes in a variety of sizes and types. They’re sold as single-color sheets or rolls; there’s also a variety of specialty vinyl for sale, such as glitter, holographic, reflective, and many others. You can even combine different kinds of HTV to make something unique for your customers.
The kind of HTV you’ll need can vary depending on the nature of the substrate. For example, if it’s activewear you’re making, you’ll need to look for HTV that’s durable, stretchable, and won’t add any weight to the garment.
Weeding Tool
This is a handy tool to help you weed out excess vinyl from your cut designs. With it, you’ll effortlessly remove small and large pieces of excess vinyl without damaging the design. It’s still a laborious process, but the weeding tool does help to make it go a little faster than if you didn’t have one.
Cutting Mat
The cutting mat is a handy tool that holds your vinyl in place while it’s being cut. Before loading it into the vinyl cutter, simply place the vinyl sheet onto this mat. This also allows you to easily remove cut pieces anytime the cutting process is completed.
Heat Press
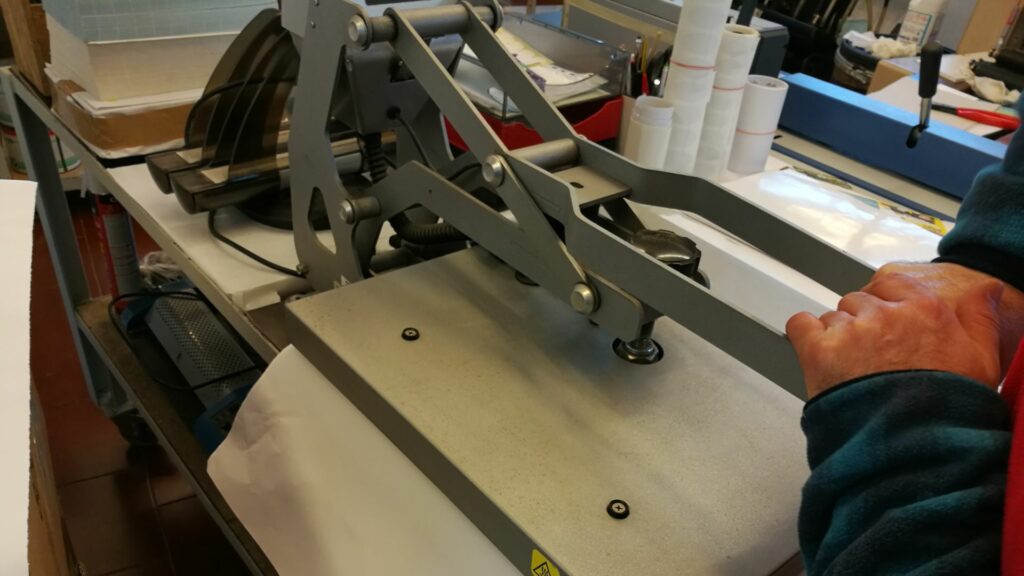
The heat press is primarily used to pre-press garments before pressing your HTV design and permanently adhering it to the substrate surface. A standard clamshell press is usually sufficient for your HTV printing needs. There are also other types of heat presses for different kinds of substrates: mug/bottle presses are a good example.
Much like DTF printing, HTV will require the right amount of heat and pressure to be applied so the HTV will adhere to the substrate without cracking or losing any of its properties. If you’re switching HTV types, make sure you do a test press to determine the ideal heat and pressure settings to apply it. You also need to ensure that the heat press applies even heat and pressure so that the vinyl adheres permanently to the substrate without problems.
Some presses may have interchangeable platens to accommodate different shapes and sizes of substrates. These may be useful when printing on certain hard-to-reach areas, such as the sleeves or even on hats.
Cover Sheet
A Teflon cover sheet covers the vinyl sheet when you’re heat-pressing it to the substrate. It serves a similar purpose to protective sheets used in DTF printing, ensuring it doesn’t get damaged while heat-pressed.
Heat-Resistant Tape
Heat-resistant tape can be used to hold the substrate or vinyl down while you heat press it, keeping it in place to ensure the vinyl adheres to where it needs to be.
Software
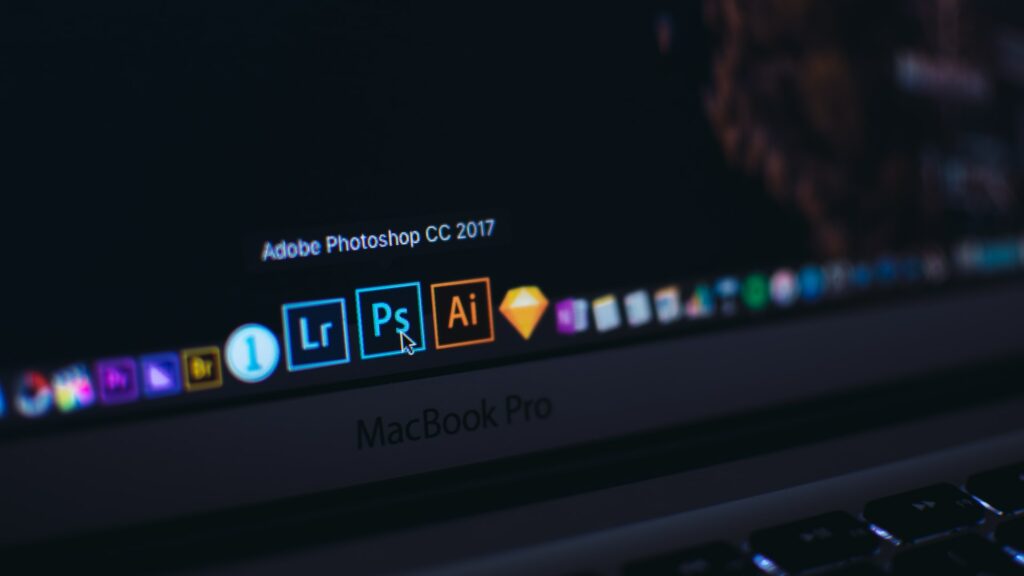
Most vinyl cutters come bundled with design software that lets you create cut files and allow you to make adjustments before getting it cut to specifications. If you’re familiar with Adobe Photoshop, Illustrator, or CorelDRAW, you can use these instead to create your cut files.
General Setup Costs
An entry-level HTV package is relatively affordable compared to other decorative printing methods. This makes it easy to start with and gives you plenty of room to practice doing it right.
Equipment

Most entry-level desktop vinyl cutters can be bought from $200 and above, depending on the brand and size; 12” vinyl cutters are the most affordable within that range, while 24” cutters can be $450 and above. Silhouette offers an affordable starter package at only $300, which includes a 12” vinyl cutter, Silhouette’s proprietary Studio software, a cutting mat, various blade adapters, and more. It even comes with a premium vinyl kit comprising 12 HTV sheets and a roll of transfer tape, on top of other useful goodies.
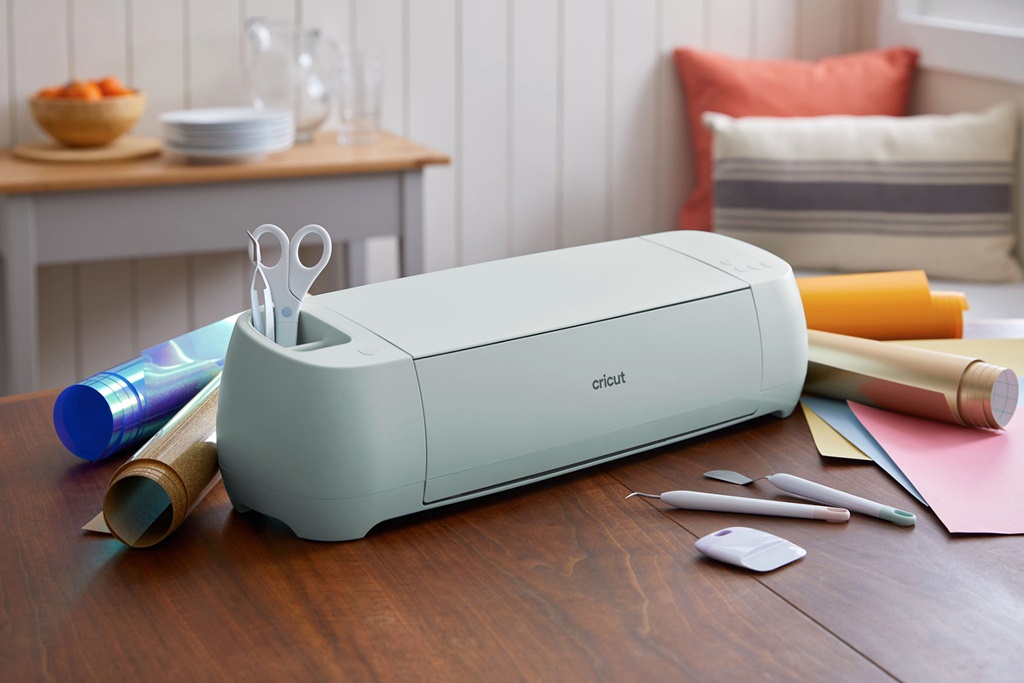
Cricut and Brother also have attractive vinyl cutters available. Brother’s ScanNCut lineup boasts plenty of useful features, with starter bundles including a ScanNCut device, 10 pieces of HTV sheets, adhesive transfer paper, and an extra auto blade for $455. Meanwhile, Cricut has a starter package that includes its Cricut Explore Air 2 machine, several vinyl and cardstock samplers, adhesive tape, and various useful tools and accessories for only $280.
You’ll find a good deal for vinyl cutters if you know where to look. There are other alternative brands on Amazon and eBay, but their quality may be hit-or-miss, so check out reviews before you make any purchases. On the other hand, commercial vinyl cutters can be more expensive: Graphtec has a lineup of commercial vinyl cutters priced from $4,000 and above, including a 64” commercial vinyl cutter that can cost you $7,295.
If that’s out of your reach, you could opt for a mid-range vinyl cutter with a stand for $1,895, which also comes with a weeding tool, some HTV sheets, and bundled software. Where software is concerned, most starter packages come with bundled software you can use; check if it might require a subscription plan to use all its features.
Consumables
Your sole consumable is the HTV itself. Since they come in many different forms, you’re bound to find them at varying price points. Standard colored 12” x 10” sheets (in a 52-piece pack) can go from $27 or more, while lower quantities are a little cheaper – one 42-piece pack we found costs $24.
Specialty HTVs can cost a little more: a 13-piece 12” x 12” glossy vinyl sheet pack costs $18. Branded HTVs, such as those made by Siser, can also be pricey: a 12-piece 12” x 15” Siser HTV pack costs as much as $39.
Accessories & Tools
Weeding tools are pretty cheap to buy. You can easily obtain a Cricut tool set – which includes a weeder, a spatula, and a scraper – for only $9. If you need more, Cricut also has a weeding tool set with 5 different tools for $16 (currently on sale at the time of writing).
Cutting mats are also relatively inexpensive, especially if you can find compatible mats that work with any brand of vinyl cutter. Cricut sells its own mats in different sizes: a 12” x 12” 6-piece pack they have can be yours for $20.39. Amazon and other online retailers also have other affordable options for you to choose from.
Any heat press will be ideal for your HTV needs if you get one in the right size. Make sure also to check what configurable settings are available for the heat press: you want to be able to cover a wide variety of HTVs and ensure consistent heat press results.
A decent heat press can cost you about $200 and above. If you’re on a budget, Cricut offers small-scale (usually handheld) heat presses from $50 to $250. We would recommend reliable flatbed desktop heat presses like those made by Hotronix, Fancierstudio, and Vevor for better, consistent results.
Labor and Other Considerations

Even if you are operating independently or with help from family or friends, you still need to determine your labor costs and decide on your overall profit margin from sales.
- Sales Time – looking for customers is also a labor cost. It can depend on whether they’re walk-in customers recommended by previous clients or cold-call customers.
- Accounting Time – how much time do you spend managing your business accounts? From generating quotes and sales orders, contacting vendors, or even negotiating with customers.
- Shipping & Handling – how will you deliver your orders to your customers? What considerations should you weigh when planning to ship orders out?
- Maintenance – how often should you check on your equipment’s condition?
Entry-level setups only need one person to create custom garments, but that’s only logical for small sellers servicing a very small number of customers. When demand increases, you’ll need to get better equipment to meet it, and you’ll need to hire people to help you out.
You’ll need to be realistic about your assessments of labor costs, especially if you have a team of employees helping you run the business and get garments printed. You’ll need to factor in their wages and your business’ overhead costs: utilities, upgrading equipment, replacing old ones, etc.
Starting Small with HTV
Let’s look at an example where you plan on starting your own HTV decorative printing business, but you want to start small first. This gives you some time to learn the method and experiment with different HTV applications.
Given how it’s not too expensive to start with an entry-level setup, let’s take a closer look at how much you’ll actually be spending.
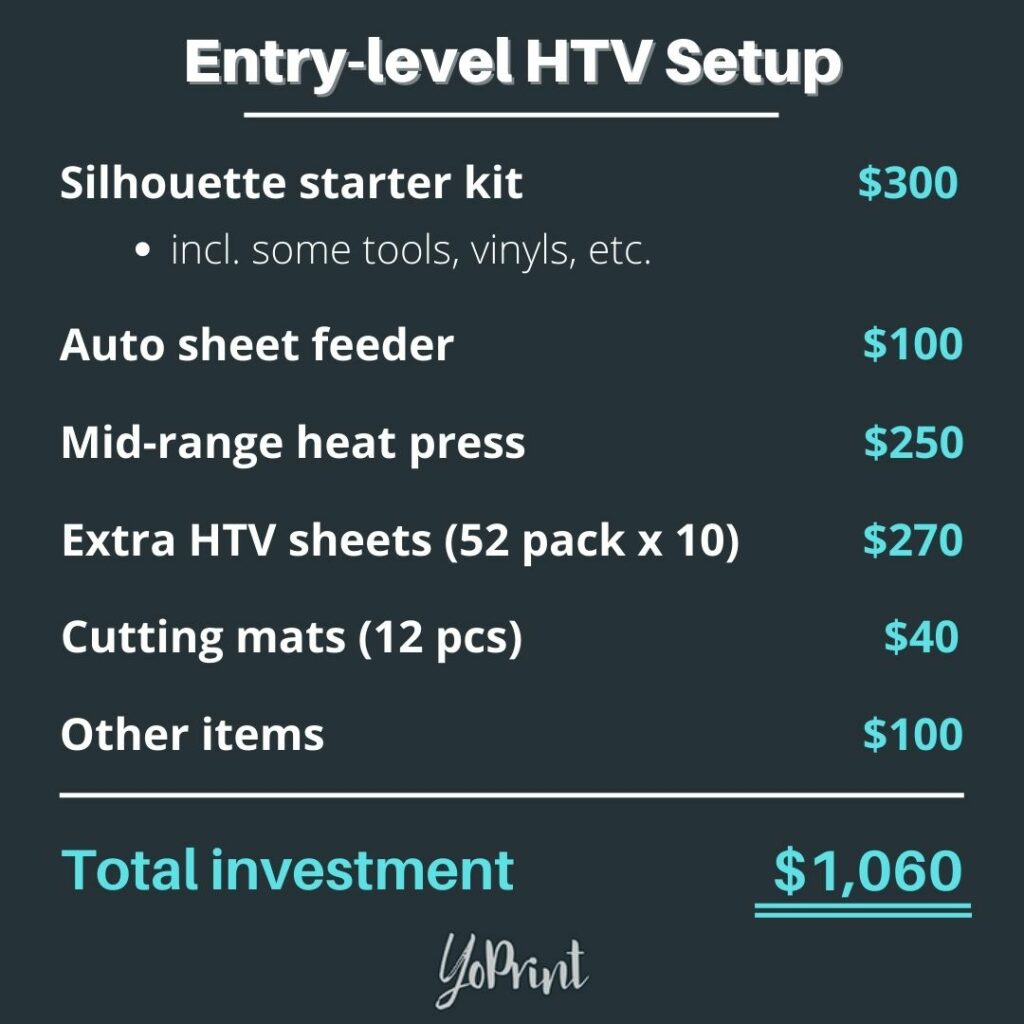
With a few lucky deals or second-hand purchases for hardly used new equipment, you can have everything you need for only $1,060. It’s comparably priced to an entry-level DTF setup that uses converted printers; in most cases, however, it’s one of the most affordable options to get into decorative apparel printing.
Pricing your HTV can be a little tricky at first because you’ll need to find a balance between pricing for profit and getting customers’ attention. If it’s too low, you won’t be able to scale up your operations; if it’s too high, you won’t generate interest because your prices may be higher than current market trends.
The first step would be figuring out your costs. Obviously, you’ll mark up your prices based on your total costs, but the how of it is still important. Take your vinyl sheets, for example: how do you charge your customers for the vinyl you use with every order? You can’t charge them for an entire yard of vinyl, especially if you don’t use all of it.
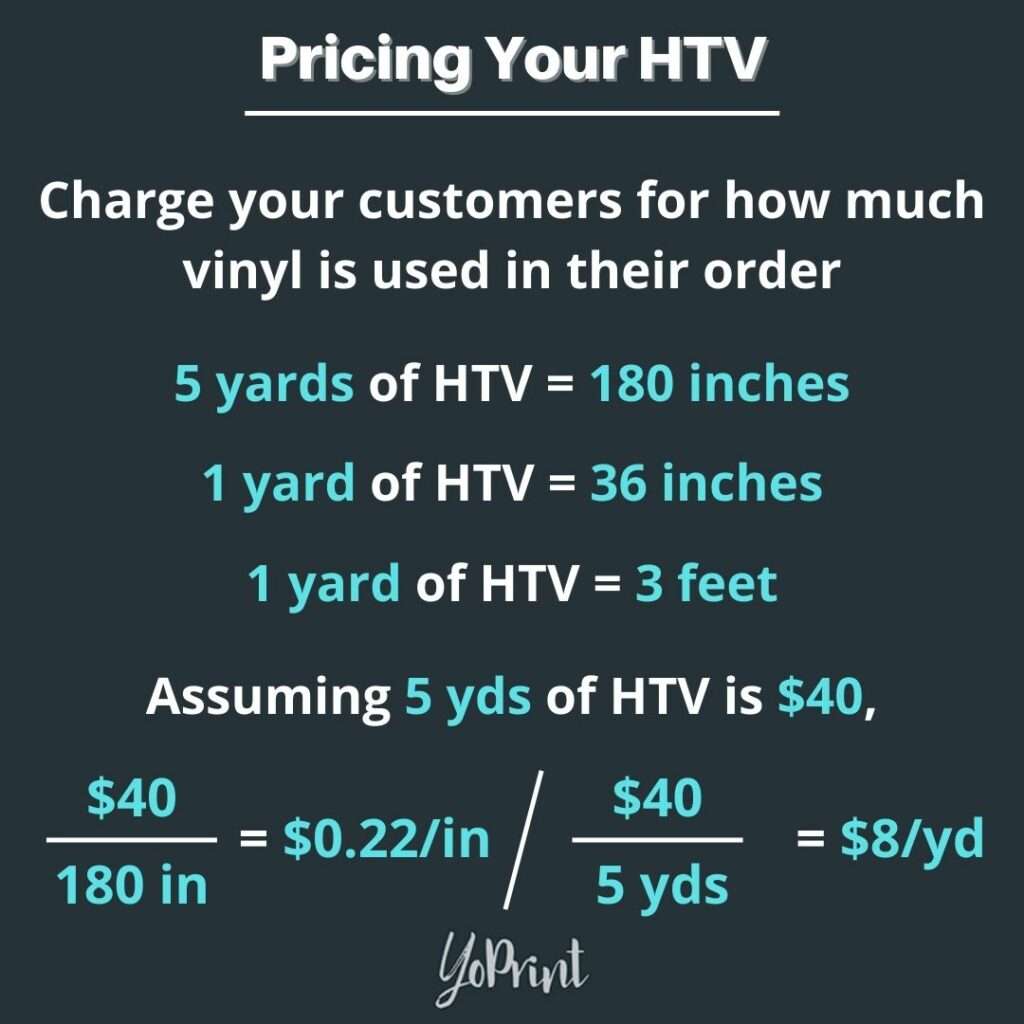
This formula will be beneficial to help you plot out how much you should charge your customers for the amount of vinyl needed in their order. If an order only needs 24 feet of vinyl, that’s a sum of $5.28. But you’re not only charging them on the vinyl alone; your cost of goods (such as the garment) will also be a part of the calculation.
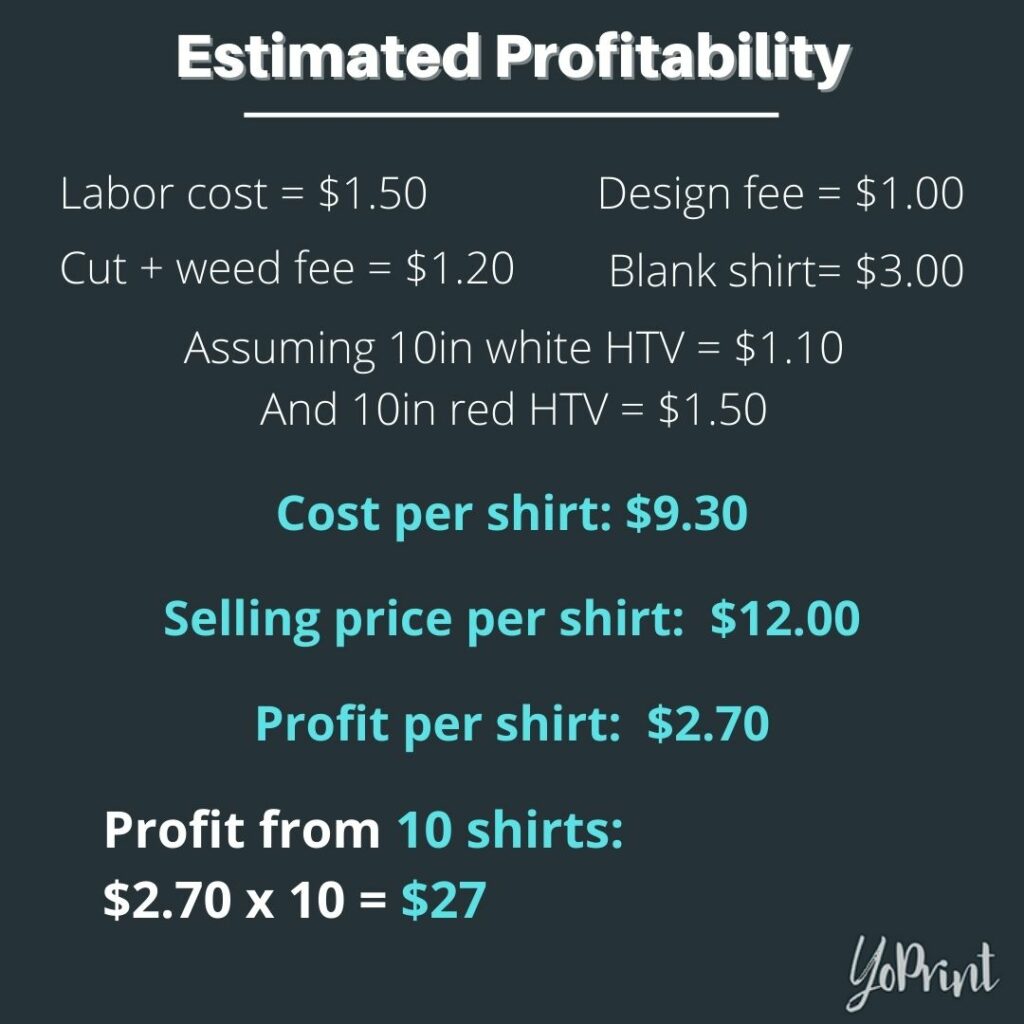
Let’s review an example order of 10 shirts that need white and red HTV for their design. Assuming 1 yard of white HTV is $19.80 while 1 yard of red HTV is $27, you might get the following:
Remember that these are only estimates. With how there are plenty of different kinds of HTV brands out there, you could find one sold at a decent price and still has good quality. This way, you can keep costs down but still have some room to mark up your products’ selling price. You may need to tinker with the estimates to get something that will work for your shop.
Also, remember that this is generally ideal for a small-scale setup with a few customer orders in a month. For a mid-range setup, you may need more vinyl cutters to complete multiple orders reliably or have more powerful vinyl cutters that can cut multiple designs simultaneously. Larger vinyl plotters on stands may be a good pick for the latter: rolls of HTV can be mounted on, then fed into, the machine to print and cut the desired designs.
A Mid-Range Sample
Let’s move on to a mid-range sample instead as a comparison with your entry-level setup. Of course, the most notable difference is the price investment.
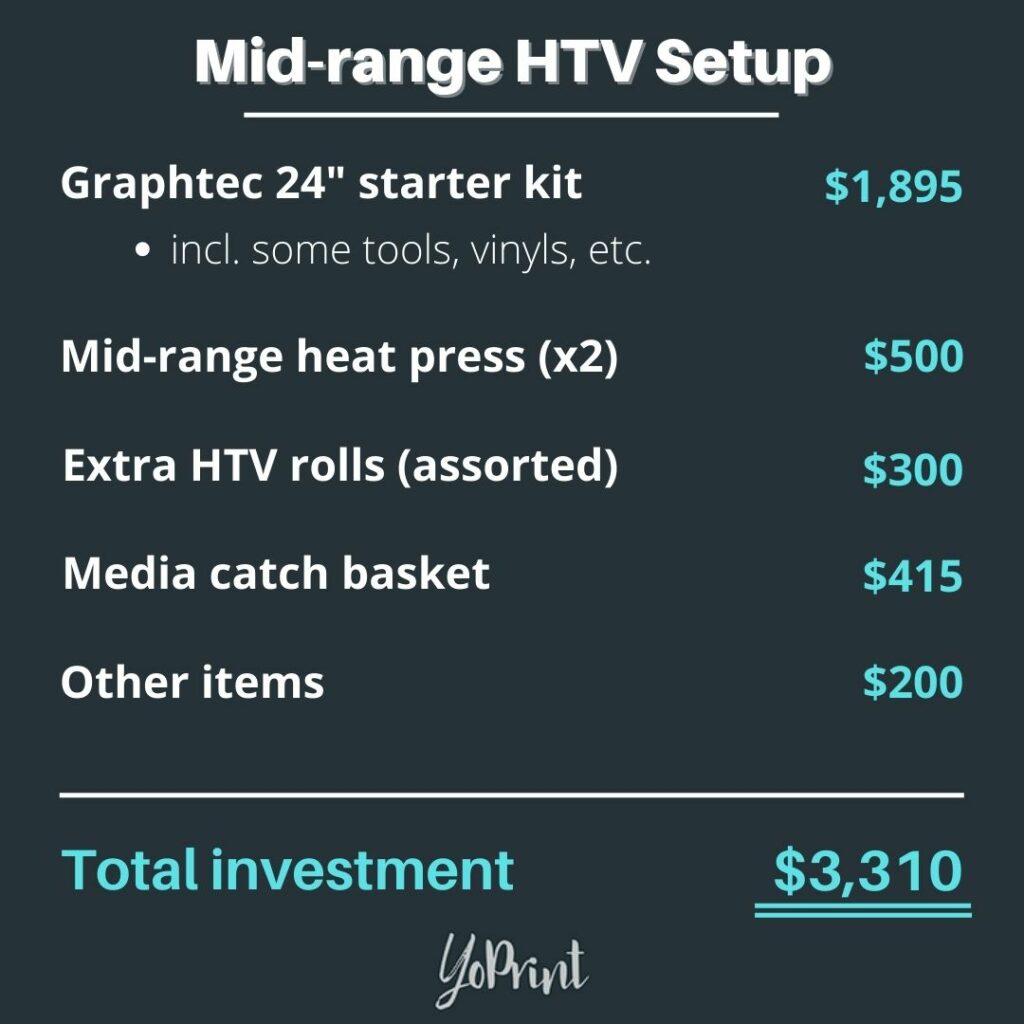
This is about three times the amount you need for an entry-level HTV setup, which is actually comparable to other decorative print methods’ entry-level sets. All things considered, that’s not too bad: even a mid-range DTF printer kit can go for as much as $10,000 or higher.
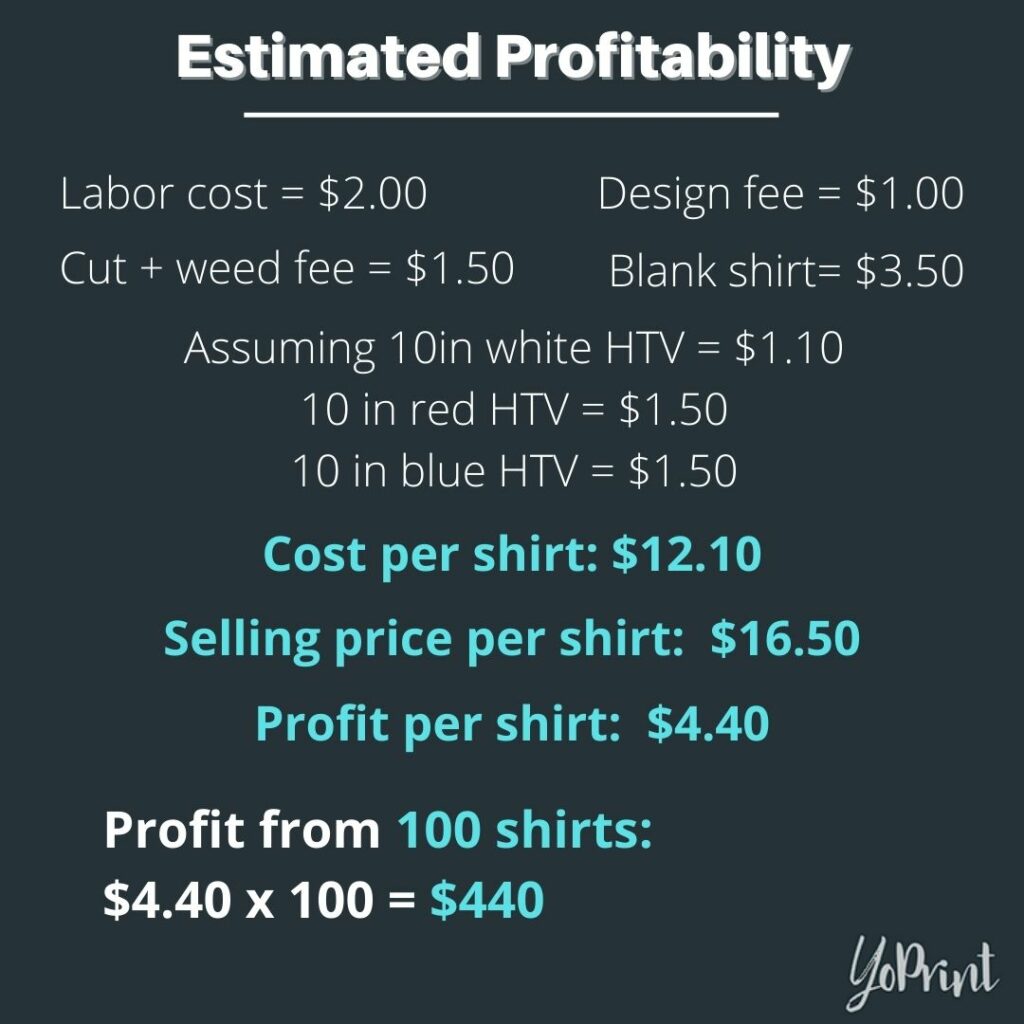
You’ll note that your profit margin has increased substantially due to the order requiring two different colors. You can charge more to add extra colors or specialty vinyls to a design, which makes a good way to improve your profitability. While allowing customers to add as many layers as possible may be tempting, remember that each additional vinyl needed in an order will mean more time spent cutting and weeding.
You could always experiment with preferential rates for specific order amounts, rewarding higher quantity orders with more competitive rates. This will incentivize your customers to order more items, allowing you to drive a relatively strong profit margin.
What Makes HTV A Good Choice?
HTV might be a highly inexpensive way to begin with decorative apparel printing, but that’s not the only thing it has going in its favor.
Low Entry Ceiling
The earlier example shows how easy it is to acquire budget-friendly entry-level equipment. With how affordable even new vinyl cutters can go, you can quickly start a home business and make some vinyl prints once everything is set up. On top of that, many vinyl cutter brands offer educational tools to help you quickly become accustomed to your new machine; there are also plenty of resources you can find online, including YouTube tutorials for different types of HTV applications.
Starter packages sold by various vendors can also sweeten the deal, adding some supplementary equipment and supplies to help you get your business up and running. Granted, some of these – especially the professional-grade packages – can cost you a significant investment, with some going up as much as $12,000 or higher.
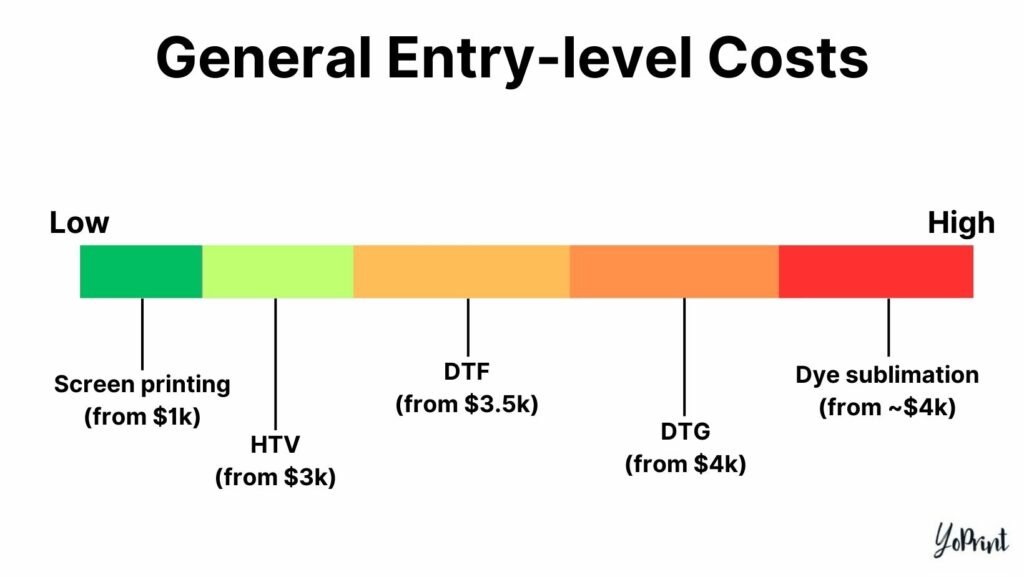
Compared to other decorative print methods, HTV is still a more affordable option. Even entry-level direct-to-garment (DTG) setups need at least $4,000 (or more) for a starter kit that includes a printer, a pre-treatment machine, a heat press, and RIP software. Meanwhile, DTF entry-level setups are almost comparable to DTG: a starter DTF package with a printer, inks, RIP software, adhesive powder, and transfer sheets can go for $3,500.
The closest that compares to HTV’s low entry cost is screen printing: a simple 4-color single station with a flash dryer, an exposure unit, and starting supplies with ink and emulsions can go for only $2,000 – just double what HTV needs.
Simple Yet Effective
The HTV preparation process involves cutting the design in the cut file and transferring it to a garment via a heat press. This makes it a relatively straightforward but effective decorative method comparable to DTF printing without requiring transfer films for your designs. The weeding process might take some time, especially if you have multiple designs for an order; with enough practice, it’s possible to weed a design in under a minute (depending on its overall complexity).
HTVs are also available in so many forms that you’d be spoiled for choice. You can easily add glitter, foil, and other effects to garments, all with the same application method. You’ll need to layer each vinyl and heat press them one after the other, and it won’t take you very long to set them onto the garment. Additionally, these specialty vinyls are a little more expensive than standard ones, but this does allow you to mark up your prices to account for their unique properties.
Fast Turnaround
Once you’ve gotten the hang of using your vinyl cutter, getting your designs out onto garments doesn’t take very long either. For small and simple designs that don’t require a lot of cuts, your vinyl cutter may be able to finish a cut within a minute or two. The more complex the design is, the longer it will take. There are useful tools you can purchase that can help expedite the process; one such example is an automatic sheet feeder that loads your vinyl cutter with new vinyl once it finishes a cutting job.
We’ve mentioned earlier in this article that weeding also doesn’t take very long. Again, the time you need to weed a design will vary depending on its complexity, but it’s usually quite manageable with a weeding tool handy. You’ll still need to be careful with the weeding process; if you rush it, you might end up removing pieces that are needed for the design – and that means going back to the vinyl cutter for a new one.
Larger wide-format vinyl cutters are able to print and cut on wider vinyl rolls, making them ideal for medium-to-large scale HTV businesses. However, your production speed can start to slow if you take up too many orders at once and if each order requires multiple vinyl layers per design. If you have the manpower and equipment to complete all these orders reliably, that’s great, but it still is very time-consuming.
The existence of printable HTV does make it much easier to get more vinyl designs out quickly. Printable HTV is basically similar to DTF printing, where you’ll print your design onto special heat-transfer vinyl sheets. It lacks the specialty vinyl options that regular HTV has, but it makes up for that with faster preparation times and equally vibrant colors.
Decent Durability
When applied and stored correctly, HTV has a significant level of durability that rivals the other printing methods. It can last even after a good amount of washes, but eventually, the vinyl will begin to crack and peel as it loses its adherence to the substrate. This is quite similar to DTF and screen printing; both methods merely apply the design (whether it’s ink or vinyl) onto the surface of the substrate. In contrast, DTG printing and dye sublimation drive the inks into the substrate itself, giving them better durability and wash fastness in comparison.
Vinyl has a nice, soft touch comparable to DTF or DTG printing. The feel of vinyl can still vary depending on the brand you purchase: some may have a slightly plastic-like feel, while others have a premium touch. It does stand out when you use softer substrates like cotton, but you won’t be able to tell the difference on polyester activewear.
While HTV doesn’t come apart very easily, your mileage will still vary depending on the vinyl you use. The vinyls also aren’t particularly stretchable as DTF and DTG printing. While designs return to their original state after some stretching, if you do it too often, the design eventually loses its shape.
Versatility

This is where HTV excels, putting it in the same category as DTF printing with its versatile use on nearly any surface. Much like DTF printing, you can easily heat press HTV onto garments and on ceramic mugs, water tumblers, bottle holders, signs, and even vehicle decals (although this may require more specialized tools). This opens your business to so many different possibilities: why restrict yourself to one medium when you can also do it on so many more substrates?
Decorative printing is still gaining much traction, not only with custom apparel. People looking to give gifts for special occasions may need custom-made special items, which can be a lucrative niche if there’s sufficient demand for them. Small items are a good idea to start with: you can have multiple designs sharing a single yard of HTV, helping you cut costs and maximize your productivity at the same time.
You’ll need specific equipment to enable you to heat press onto different kinds of items properly. Mugs heat presses will have a round clamp that makes it easier to hold it in place as you heat press the design onto its surface. Some of these heat presses may even be compatible with certain water bottles, tumblers, and other round items of similar size.
Maintenance
Any piece of equipment requires regular maintenance to keep them working optimally, and your vinyl cutters are no exception. After some time, dust, grime, or scrap from past projects may accumulate; be sure to clean your machines as often as possible, but don’t spray any cleaning agents or liquids directly onto your machine. You’ll never know if it might just permanently damage its internals!
Most basic maintenance for your vinyl cutters is relatively simple. As long as you follow the provided instructions, your vinyl cutters can last a very long. You may also need to replace the cutting blade to ensure your designs are cleanly cut for every project. Other components will also need replacing occasionally – be sure to read the manual thoroughly!
In the event your vinyl cutter experiences any technical problems, don’t try to do any maintenance on your own. If it’s still under warranty, have the manufacturer or the vendor you bought it from repair it for you. Don’t try to do any maintenance on your own, especially if you don’t know what you’re doing! There may be videos on maintaining every facet of your machine, but if you’re unfamiliar with fiddling with the cutter’s internals, don’t try it. You might end up with a faulty machine and void your warranty at the same time!
Conclusion
HTV is a great starter if you want to create custom goods for an interested customer base. You won’t need to break your budget or spend a lot of time learning the intricacies of getting a good print (like in the case of screen printing): just get your cut file, cut it out, then heat press it to the substrate. It’s as easy as DTF printing while remaining one of the most affordable print methods to work with.
Given that your only investments are for various vinyl sheets of different properties, and with this much lower skill ceiling to start with HTV, it caters to small-scale printers who want to make unique merchandise on a wide range of items. As you scale up, you can start thinking about adding a new service to complement your existing lineup; you may even be able to combine HTV with other decorative methods and come up with something unique that your customers will love.